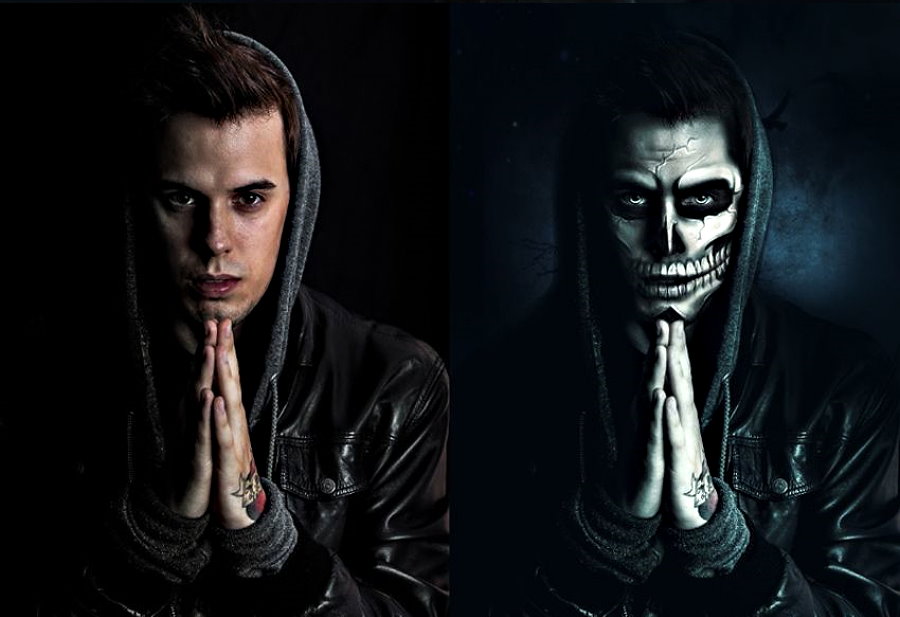
Are you as excited for Halloween as we are? We’re pretty excited!
In celebration of the spookiest of eves, here are eight fun, fresh, and frightful Photoshop actions from Envato Elements to give your pictures a Halloween spin. We even test one out for you so you can see if you fancy giving it a go!
Haunted Action
Transform anyone into ethereal spectre with this action. This non-destructive process is easy to apply and adjust, and creates a look that is completely other-worldly.

Noire Actions
Not one, but twelve actions are included in this set to help you create a cool, dark cinematic thriller look. Choose a heavy effect (like below) for maximum mood, or dial it back for a subtly unsettling twist on reality.

Zombie Action
People who love zombies are, well, pretty darn ravenous about ’em. Make the zombie look without the make-up using this Photoshop action. Paint-in the area to zombify and run the action for full flesh-eating glory.

RGB Glitch
Glitch and distortion is unsettling in a psychological way that’s hard to pin down. It just works. Add colour offset and tracking glitches to your photos with this action. A word to the wise: with this action, spookiness is maximized in dark images containing bright highlights, as below.

Glow in the Dark Action
Inverted, vibrantly coloured, glowing images: it’s a neat look! A bit freaky. Conversely to the above, this action works best with pictures that start out with a dark subject on a light background.

Sin City Action
Rich black and white with a touch of blood red—classy, and more than a little bit dangerous. Inspired by Frank Miller’s neo-noir graphic novel and film of the same name.

Duotone Action
More than a hundred colour variations are possible with this action. Discordant colours work well for halloween, but, like the Sin City action above, a perfect choice is red and black: moody, foreboding, heavy. Sinister!

Clown Photoshop Action
Turn any face into a scary clown face. This action contains 10 types of eyes, 6 paint options for eyes, 5 special horror effects, 3 paint options for mouth and many other interesting tools. Start creating your own IT inspired photos.

Give it a Try: RGB / Glitch Photo FX
The thing I like about RGB/Glitch Photo is that it’s really simple to use – you don’t need to install anything, you just have to open up the included PSD file.
When you open the file, you’ll see there are several elements in folders in the Layers panel

The spookier your image, the better, but it’ll work with just about any image. This is the one I’m using:

Right click on IMG-HERE and click Replace Contents. It might take a while to import depending on the size of your picture.
I recommend you try it with a smallish image – I tried a 4000px wide one and it took forever, and then needed to be resized anyway. Start with around 2000px and see how you go.

Make Adjustments
The effect looks great, but we’ve lost a lot of the original detail, so make some adjustments to get a happy balance.
The options under RGB glitch are only slight variations, so I left 01 visible but reduced the opacity to around 35% so there’s a hint of green but it isn’t overpowering.
Under Horizontal lines there’s an option to add more or hide existing ones. I’ve made another set visible but reduced the overall opacity. Same with Dust and Noise – I’ve reduced a few of the visible layers to tone it down a little. Here’s how it looks so far

The IMG glitch folder is where you can choose the main distortion features, the really heavy black horizontal lines. I’ve chosen option B because you can see parts of the image warped within the lines, so they’re not just plain black. I think that gives a better ‘glitch’ effect and also a sense of movement
Finished Result
Here we have our spooky cabin in the woods, with added glitch effect!

Five Quick Tips for Halloween Pictures
Halloween imagery tends to be dark, in composition, lighting environment and subject. This creates a few challenges and opportunities for portraits:
- Use a flash, if you can, to help stop motion and create a crisp image. If you’re up for it, take the technique one step further with a slow shutter speed. This will create a crisp image and spooky ghosted motion blur.
- Hard light is better than soft for a dramatic look. One small light is usually enough to create a hard-edged image.
- Halloween costumes often have great texture, like the zombie photo above. Keep colours simple but bold to help focus the viewer’s attention on this aspect.
- Ask your subjects to act as their character. This will help them get into the mood, and give you better expressions and poses.
- Don’t be afraid to go over the top and experiment! Halloween is a great opportunity to test your boundaries as a photographer and try new ideas.

No Responses